| Casting West African
Pirogues - the mold
|
|
 |
 |
| Having just finished painting up my river
steamer I decided the next thing was a fleet of pirogues for my West
African native army to attack it with. As comercialy available models seem
to go for about $10 a pice and needing about 16, I decided casting them
the best alternative. This cost about $5 for the molding rubber and 25c¢
a piece for the hydrostone.
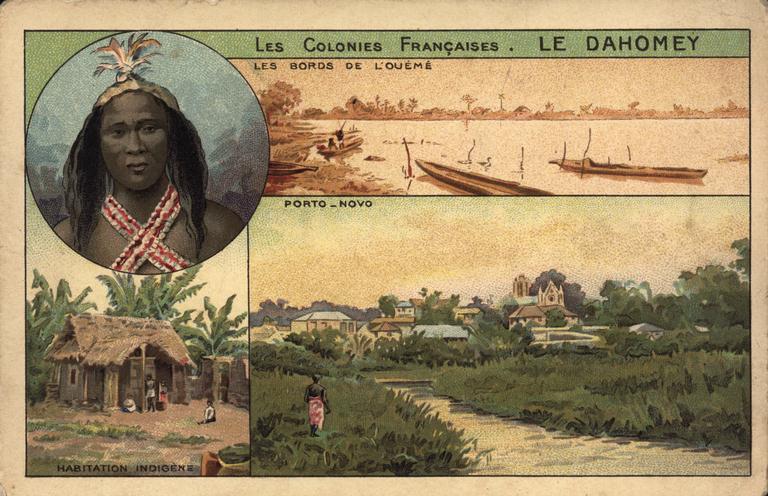
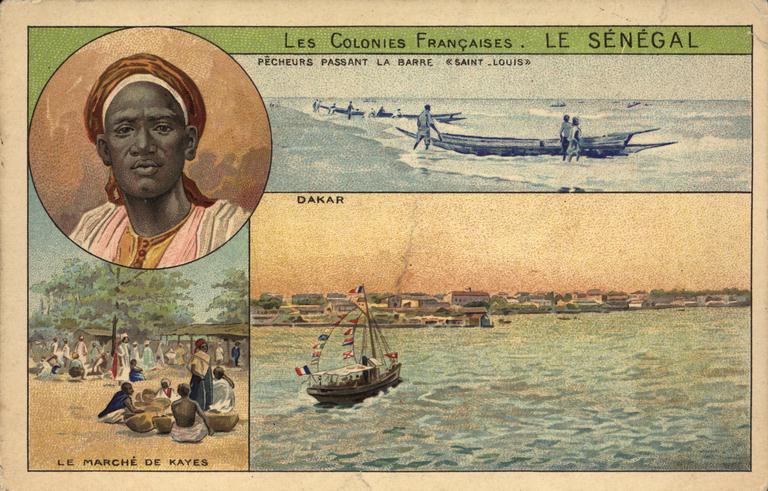
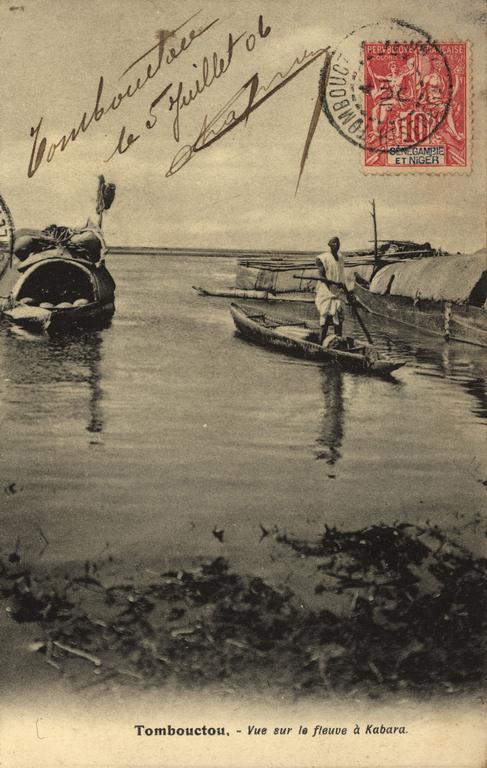
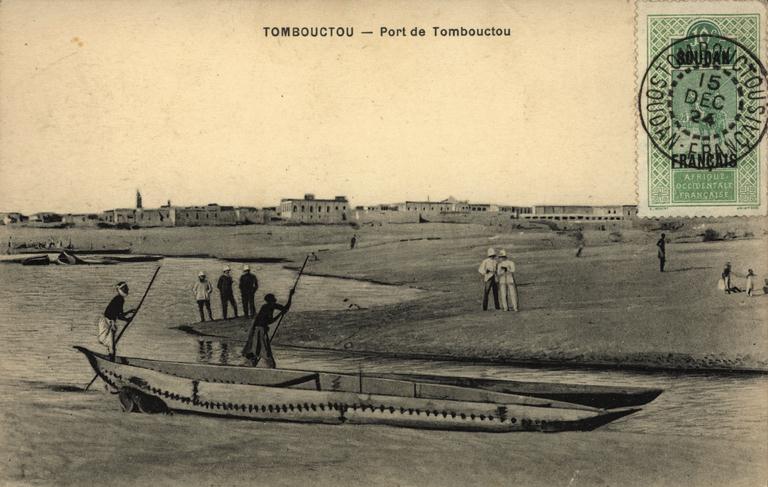
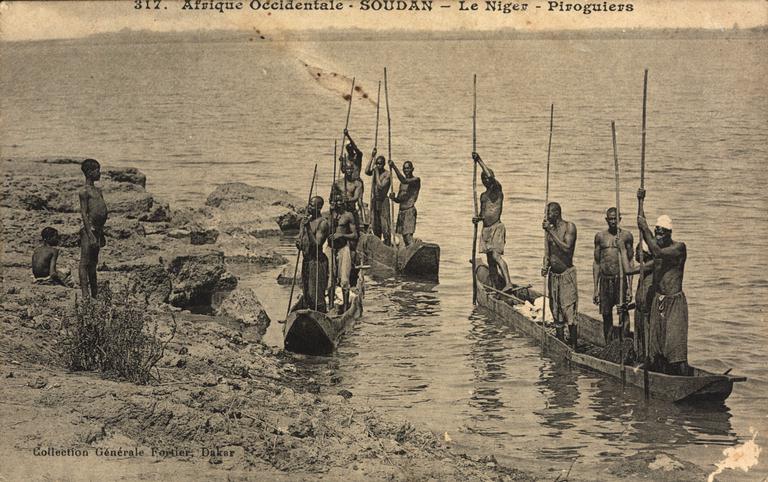
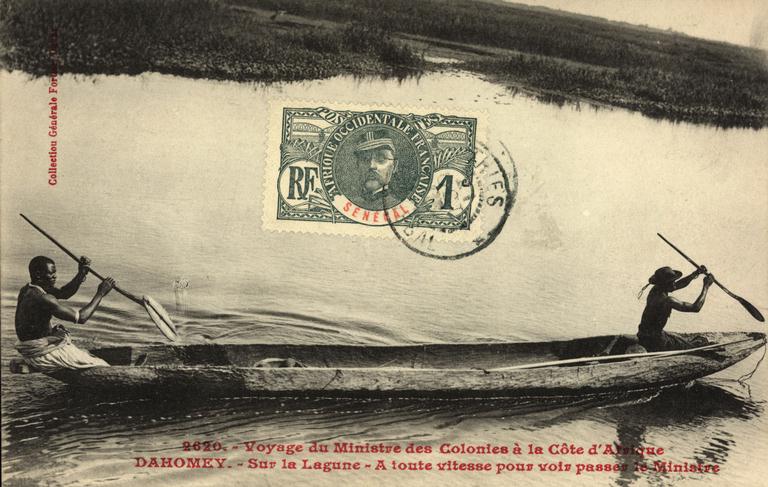
Selecting the thumbnails below will take you to some images of pirogues from the time and region of our gaming. The model is basic but serves the porpose, and aafter painting will look the part |
 |
|
||
 |
 |
 |
|
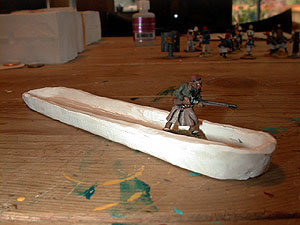 1.
First, I started with my model pirogue. This was made from sculpy and is
a very basic waterline model. I deliberately made it just large enough
for 10 penny based figures to fit it ,which is basically a half unit for
The Sword and the Flame. 1.
First, I started with my model pirogue. This was made from sculpy and is
a very basic waterline model. I deliberately made it just large enough
for 10 penny based figures to fit it ,which is basically a half unit for
The Sword and the Flame.
As you can see from the model, it is flat bottomed piece with a simple wall around it. I cut a few grooves in the bottom to dive the appearance of gouged wood. |
2.
The model needs to be attached to a flat base. If the model is small, a
ceramic tile is suitable, for larger models, a sheet of plastic or glass
provides a suitable mount.
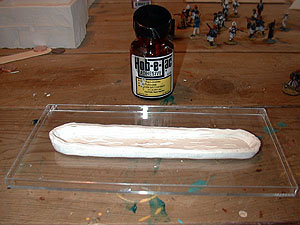 After the model is affixed to the base, we need to make wall around the model to retain the rubber we're going to pour over it. Some molders like to make a wall out of lego building bricks. Not haveing any lego, I use plasticine modeling clay, obtainable from any toy or craft store. |
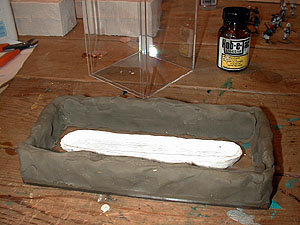 3.
The
plasticine is kneaded into a long flat piece and pushed down onto the base
to form a wall, or dam, around the model. In this example, I probably left
too much of a gap around the model and therefore had to use more rubber
than was necessary to cover the model. 3.
The
plasticine is kneaded into a long flat piece and pushed down onto the base
to form a wall, or dam, around the model. In this example, I probably left
too much of a gap around the model and therefore had to use more rubber
than was necessary to cover the model.
The dam needs to be a little higher than the top of the model, of course, so that it can be completely covered by the molding rubber. |
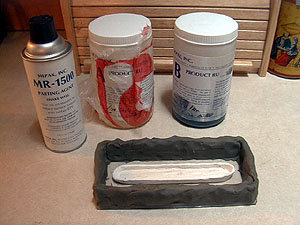
This particular product is especially suitable for casting hydrostone - a rock hard cement plaster - which will be my casting choice for this project. Here you can see the two part molding rubber and a suitable mold release agent. The interior of our molding container is sprayed with the mold release, ensuring it gets over the base, model and interior side of the dam wall. |
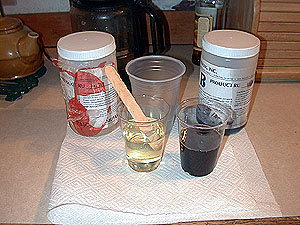 5.
The
two parts to the molding rubber are measured out by volume. As you can
see in the picture, I use two small disposable cups for the rubber, with
a larger one behind where the mixing will be done. Be sure and do this
on a paper towel or something to catch any drips. The only other essential
thing to remember is not to put the caps from the two part rubber solutions
on to the wrong bottles - or you'll never get them off again. 5.
The
two parts to the molding rubber are measured out by volume. As you can
see in the picture, I use two small disposable cups for the rubber, with
a larger one behind where the mixing will be done. Be sure and do this
on a paper towel or something to catch any drips. The only other essential
thing to remember is not to put the caps from the two part rubber solutions
on to the wrong bottles - or you'll never get them off again. |
| 6. Before
I proceeded at this point, I put everything away. This is actually a very
simple project,
.
and if you remain organized, you can complete it swiftly
and efficiently. This entire project from start to finish, including getting
out the material, photographing it as I went and putting things away again,
took about 20 minutes. You may want to take a little longer if this is
your fist attempt -but the key is organization.
 7. The two components of the rubber are mixed together in the third cup and thoroughly mixed until the mixture reaches a consistent color with no streaks, Stir evenly and do not fold bubbles into the mixture. |
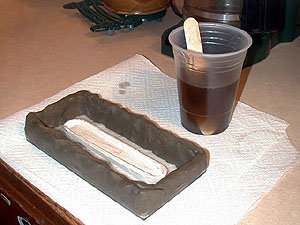
.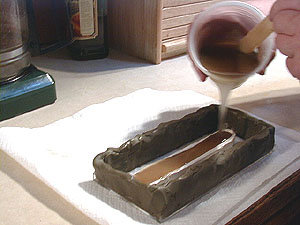
Pour the mixed rubber into the mold box, starting by pouring over the model itself. Poor slowly and evenly. After the rubber has been poured into the mold box, take the stirring stick and drag it along side the model to dislodge any bubbles. Do this slowly and gently so as not to disturb the model from it's base - we wouldn't want it to float to the surface at this point. |
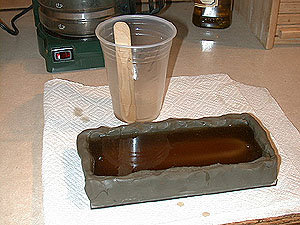 That's pretty much it for this process. Place the mold box aside and throw away the cups and stir stick. It takes several hours before you can de-mold the rubber. |
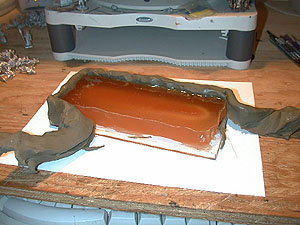
9. After the rubber has set, it's a simple matter of pealing away the dam. Thi plastecine can be saved for another project but be sure and wipe off the mold release agent still on it.. The block of rubber should peel away from the base easily because of the mold release agent. It may be necessary to pry the model up from the base to free it from the rubber cement. Clean away the mold release from the sides and base of the mold. |
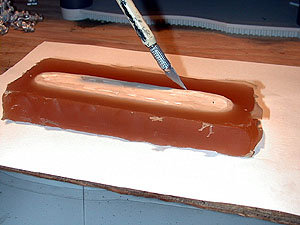 Before removing the model from the mold, let it set overnight. After popping the model out of the mold, we are ready for the next step. Casting our fleet of pirogues. |